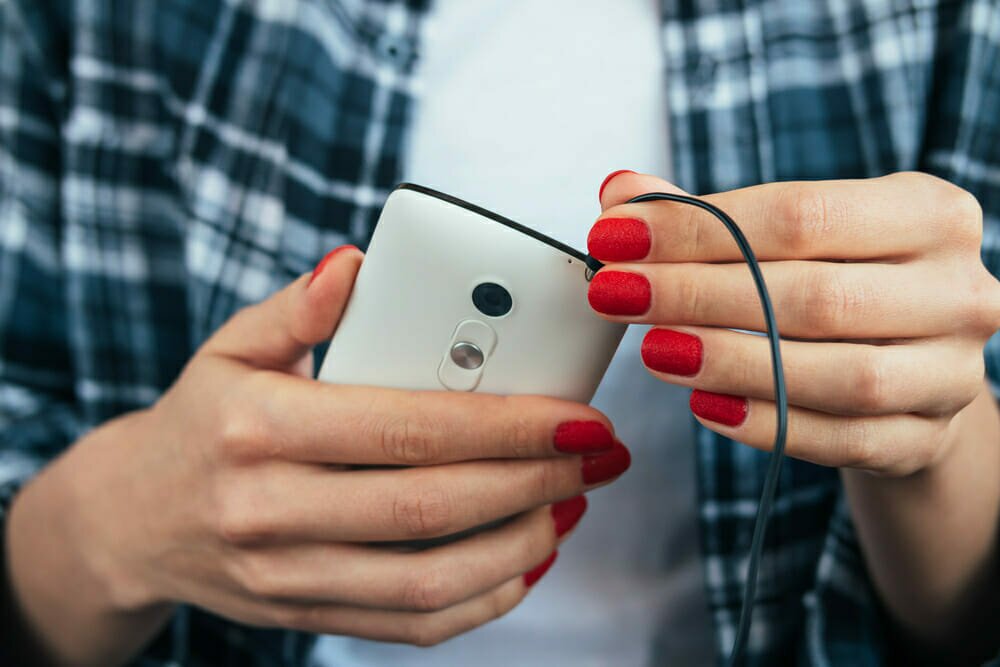
You might worry that your headphone jack is broken if you realize the headphones are not playing any audio while they’re plugged in. It’s possible that you’re on the right track, because not hearing phone calls or music from your iPhone can be a sign of a hardware problem. If your headphones are connecting to the phone, there are a few potential culprits!
Luckily, there are steps for fixing the problem by yourself before deciding it’s broken. When it comes to the headphone jack on an expensive phone, it’s good to try to resolve the issue for free before heading to the Apple Store!
Plug In Some Different Headphones
Before anything else, make sure that the problem isn’t actually with your headphones rather than the jack. The cost to replace headphones is going to be a lot less than paying to fix the headphone jack.
If you can, grab another set of headphones and plug them into the jack and try out a few different activities like listening to music, making phone calls or talking to Siri through the mic. If you find that your iPhone works with these headphones plugged in, you have a cheaper answer to the problem in using those headphones.
Otherwise, it may be time to set aside your headphones and start looking into somewhere that can conduct complex hardware repair on your broken headphone jack. In which case you won’t also have to buy new headphones.
Try Cleaning It Out
One of the biggest problems that effects your headphone jack is lint. Many people tend to hold their iPhones in a pants pocket, which can be prone to lint build-up. That gunk builds up and can easily get into your headphone jack. Luckily, there are some methods to clean out the jack:
Check For Lint
Take a look into the jack. Shine a light into the area to get a better look. If you detect lint, or even suspect lint potentially building up in your phone, it’s worth cleaning it out. This build-up can cause connection problems due to the lint blocking the headphones from the jack.
Blow It Out
If you do happen to see lint in the jack, you can usually blow it out. Compressed air is the best option because your breath contains moisture that isn’t great for the jack. If the lint blows out by shooting the compressed air into the headphone jack, it may solve the problem.
Try Swabbing It
If you find that the lint has become packed too tightly and won’t come out of the headphone jack, you can also attempt removing the lint with a cotton swab. Start by taking as much cotton as possible off the swab. Then, get a small amount of rubbing alcohol onto the clean end and insert it into the jack gently.
Move it in the headphone jack and work all the way around, pulling out as much of the lint as you can.
Try out the headphone jack again once all the lint has been removed. If you find that it is still not working, then it may be time to take a look into the software. Sometimes these settings can cause trouble for your connections, so they’re worth fixing!
A Bonus Tip
Periodic cleaning of your headphones can be a great idea. It’s easy to do while cleaning the jack, and can avoid irritation to your ears caused by harmful bacteria. Cleaning your headphones can also increase their overall life.
Try Restarting The Phone
One of the key troubleshooting steps you can take is restarting your iPhone. While it won’t effect the permanent storage, restarting your phone can clear the iPhone’s active memory, which can correct the source of the problem without further efforts. To restart the data and preferences on your iPhone, follow the steps below.
Preparing It
Start by pressing the on/off button and holding it down. Depending on your iPhone model, it may be on the side or top of the phone. If your model is an iPhone x or iPhone 8, press the volume up button at the same time.
Turning It Off
Move the slide on your iPhone to power off slider. This should be a left to right motion. At this point, the iPhone should shut down.
Turning It Back On
Hold down the on/off button on the iPhone again. Hold it until the iPhone turns back on and displays the Apple logo. Release the button and allow the phone to finish starting up.
If you find that your iPhone doesn’t turn off through this method, you may need to do a hard reset. Follow the guidelines for your specific iPhone model when restarting the phone. Then, try using the headphone jack again. If you are still having problems with hearing the audio, move onto the next step.
Take a Look At Your AirPlay Output
Another thing that can effect your audio output is that the iPhone may be sending it to another location, such as the AirPods or an AirPlay compatible speaker. This is a problem when you are trying to listen to your iPhone’s audio through attached headphones. To investigate your settings, follow these steps:
Open The Control Center
From the bottom of the phone’s screen, swipe upward, opening the control center. If you have an iPhone X, try swiping from the top right down.
Check The Playback Controls
The music playback controls should be on this screen. Press that button to take a look at the control settings.
Look At Your AirPlay Settings
When you see the AirPlay button, tap it. This will show all the available output sources. Then, tap on the “headphones” option. Lastly, tap your home button.
The phone should recognize that it needs to be sending audio to your headphones. Normally, it should automatically switch, depending on the AirPlay or plugged in headphones or speakers you are using. If there are still problems, check out this next potential cause.
Look At The Bluetooth Output
The Bluetooth settings can cause the audio from the iPhone to go to a different Bluetooth device. For example, if it’s connecting to wireless headphones or a speaker there, trouble can occur when
playing audio on connected headphones. To check Bluetooth settings, follow the steps below.
Get Into Bluetooth Settings
Start by opening the control center, then click on “Bluetooth”, you will find this icon on the top-left within a group. If this button is lit up, tap it so that it isn’t. This will disconnect the iPhone from the Bluetooth device.
Try Again
Plug in your headphones and try them again to see if the audio will play with them connected. If this test works, you’ll know the problem was just other devices attaching to it.
It’s important to check both Bluetooth and Airplay settings before deciding the jack is broken. Often times, the issue is due to some other device hogging the Bluetooth, so turning it off solves the problem.
What Do You Do If The Jack Is Broken?
If you’ve gone through all the steps and find that the headphone jack still isn’t working correctly, it may be worthwhile to get it repaired. A broken iPhone jack isn’t a great thing to deal with, but there are ways to care for this delicate device.
The best way to get your iPhone repaired is to take it into the Apple Store. This is an especially great option if your phone is still under warranty. If you aren’t sure, you can check the phone’s warranty status to see if the cost of fixing it will fit under the warranty.
If the phone is covered by a warranty, you can make an appointment to fix it. Otherwise, keep in mind that you may have to pay to have it repaired so it may be worthwhile to consider the best place to have that done.
On the other hand, if you’re especially handy then you may be able to fix the broken jack yourself, though it can be a complex task. This isn’t an option many recommend because it can be quite hard, but it may pay off if you can get it to work with your headphones.
 The 8 Best Beats Headphones of 2020
 The 8 Best Bose Headphones of 2020
 The 9 Best Floor Standing Speakers to buy in 2020
 The 9 Best Wireless Headphones of 2020